Virtual Environments In Python On Raspberry Pi
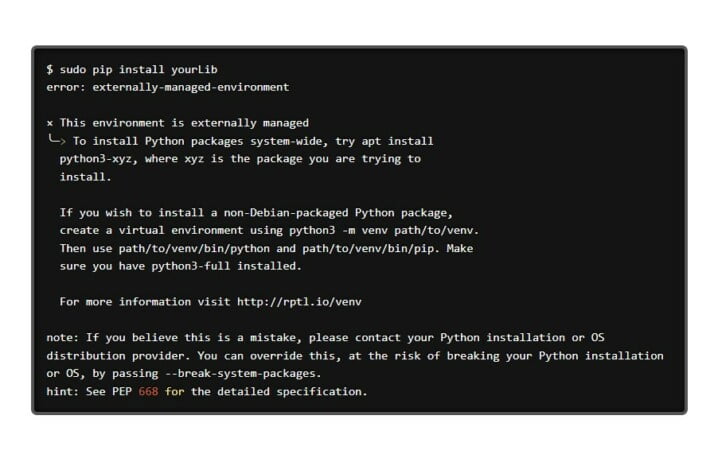
RASPBERRY PI GUIDE error: externally-managed-environment × Dismiss this alert. So, you have found yourself looking at another error in your Pi console. Unforuntatly, this
RASPBERRY PI GUIDE error: externally-managed-environment × Dismiss this alert. So, you have found yourself looking at another error in your Pi console. Unforuntatly, this

PRODUCT TUTORIAL Soldering is often intimating, but it is an essential skill when working with electronics and the reality is it really isn’t that
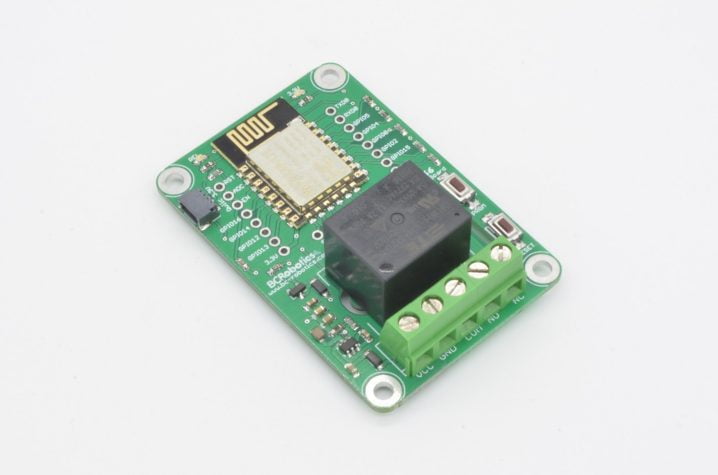
PRODUCT TUTORIAL The ESP8266 has been an integral part of the growth of simple, low-cost, IoT devices. This very small, low powered, WiFi Enabled

PRODUCT TUTORIAL Part 2 of this tutorial consisted of two different versions depending on your preferred programming language. In both the Arduino and MicroPython
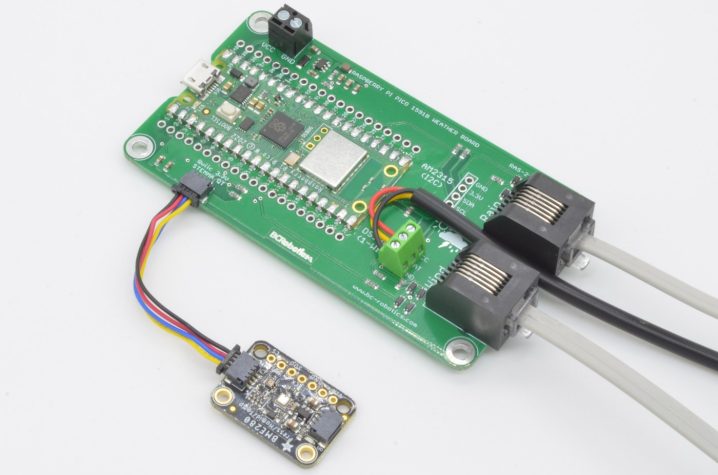
PRODUCT TUTORIAL In Part 1 of this tutorial we attached the Pico to the Weather Board and looked at all of the sensors. If

PRODUCT TUTORIAL With the release of the Raspberry Pi Pico, a whole host of low cost / low power automation projects are now possible